
How to Set Up an Embroidery Machine and Use it Properly
Getting a new embroidery machine can be an exciting time for a crafter who is looking for ways to expand their sewing skills. What you may find once it is time to take the machine out of the box is that learning how to set up an embroidery machine is a lot more intimidating than you expected. This is the point where you have to start making decisions about embroidery designs, which thread to use, and what material is best. The process of embroidery is automated, but the choices you make prior to the actual embroidery process will determine how successful you are at your new craft.
Step #1: Get to Know Your Embroidery Machine
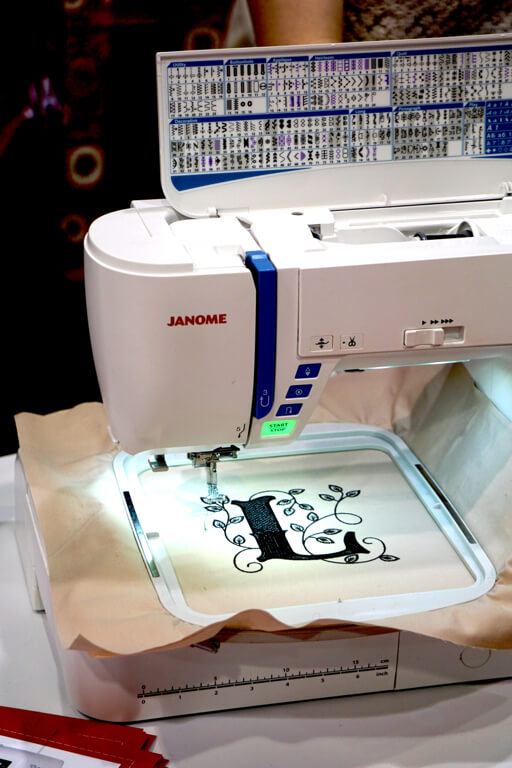
There are many brands and models of embroidery machines and each differs to some degree. If your machine is brand new and comes with a guide, this is a good place to start with setting it up. It will let you know which foot to use for the embroidery and how to go about loading designs to the machine. Not all designs are compatible with all machines and some won’t fit the embroidery hoops that are compatible with your machine.
There are many YouTube videos demonstrating the setup and use of a number of the most popular embroidery machines sold and used today. For many, seeing a visual demonstration makes it much easier to understand the different parts of the machine and how to use them. It’s also a good way to learn how to thread the machine; often one of the most complicated feats when using a new sewing machine of any kind!
Step #2: Select the Right Needle and Thread
Embroidery needles range in size from 60/8 to 120/19 with the numbers on the lower end being the finer, more flexible ones and those on the upper end of the range being heavy-duty. The higher number refers to the diameter of the shaft in millimeters and the lower number represents the number assignment according to the U.S. system.
The right needle for the job depends on the type of fabric and thread being used. The size and sharpness of the needle determine how the point goes through the fabric and how big the hole is that it makes. The idea is to choose a needle that will penetrate the fabric easily without doing any damage to the fabric or putting too much stress on the needle. The basic types of needles are:
· Universal – These needles usually work well with most fabrics including both wovens and knits. They have a ballpoint tip that is tapered so that it goes through the fabric easily. While these needles might be considered “standard”, there are some projects that require a different type of needle.
· Sharp – Sharp needles have a sharper point that makes them ideal for penetrating heavier knit and woven fabrics as well as embroidery for lace or cardstock. Some sewers prefer sharp needles for a broad spectrum of projects because it makes a smaller hole in the fabric and results in well-defined embroidery patterns.
· Ball Point – This type of needle has a rounded point like that of a ball point ink pen. The idea behind these needles is to slip between the weave of the fabric instead of penetrating it. Many embroiderers recommend using these needles for knits to prevent damaging the fabric with holes or runs.
The needle and thread work together to create embroidery and they should be compatible for each type of project. Embroidery threads come in different weights and are made of a variety of materials including rayon, cotton, polyester, silk, and metallics. One common misconception about thread is that the higher the weight, the heavier the thread. In fact, a higher weight means that the thread is finer than one of a lower weight. Rayon thread that is 40-weight is considered the standard for embroidery.
When using a heavier weight thread, you will want to use a thick thread needle that has a larger eye to accommodate the thickness of the thread. There is also a special embroidery needle for leather and suede that is designed with a wedge point that makes a smaller perforation. Other types of specialty embroidery needles include those for use with metallic threads, for quilting, and for topstitching.
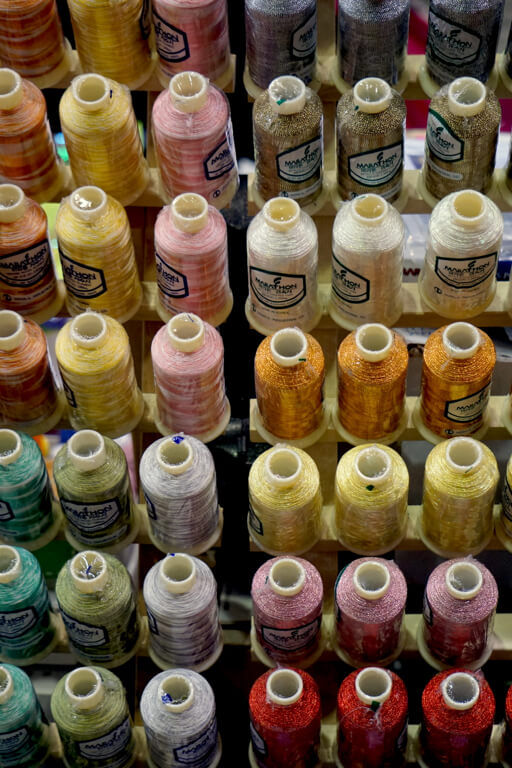
Of course, the thread color is also important to the outcome of the design. Embroidery threads are numbered according to color and these numbers will be included in the designs. You can purchase thread individually or purchase sets that include a comprehensive color palette. Collections are usually more cost-effective but you should make sure that they are high quality threads. During the embroidery process, the machine will prompt you when it is ready to go to a new color and will provide you with a digital display of the number for the color of thread to put into the machine next.
Step #3: Use Stabilizer
Stabilizer is a thin sheet of material that goes underneath the embroidery fabric to help keep it in place during the embroidery movements and it prevents puckering or pulling of delicate or sheer fabrics. It also provides a surface for embroidering open-weave fabrics such as lace. There are four types of stabilizers for different uses including:
· Cutaway – Used as a permanent stabilizer
· Tearaway – Less permanent
· Water Soluble – Temporary, dissolves when placed in water
· Tacky – Allows you to move the stabilizer and reposition
Step #4: Start Small
Taking on too large of a project before you have mastered the machine can end with disappointment when things don’t turn out the way you expected. Start with a small, beginner-level project to practice on so you won’t be discouraged if it doesn’t turn out perfect. Think of your first project as a learning experience and an opportunity to troubleshoot problem areas.
Even if you have been doing hand embroidery for years, machine embroidery is different. Something as simple as failing to use the embroidery foot instead of the standard one could result in a poor quality piece of embroidery.
Step #5: Master the Software
Most of the embroidery machines on the market today come with a specified number of designs loaded into the machine. There are also thousands of designs you can access online. If you plan to use these designs, you will need a software program to get them to your machine. Embroidery software reads designs that are digitized for this purpose.
When you purchase one of the designs online, it will need to be downloaded into your computer. The embroidery software will let you open the design where you can see it. Once open, you can edit the design to suit your needs. Once the final design is ready, you will use the embroidery software to transfer the design from your computer to your machine. Depending on your machine, this may be done by using a USB memory stick, hooking the computer up directly to the machine, or, in older models especially, by reading a card. Once you have purchased a design, you can store it for later use and for any further editing you may require.
Also, become familiar with the different settings on the machine and learn what the digital displays mean. Otherwise, you may have many more options for manipulating the appearance of your designs than you realize.
Step #6: Learn to Hoop
The embroidery hoop is the part of your embroidery machine that stabilizes the pattern. The hoops come in a variety of sizes and most machines will list the different sizes that are compatible. You should always use the smallest embroidery hoop possible with any design to make it more secure.
The hoops should be placed with the text and markings right side up in the position where you can read them. A quick-release button will be in the corner, along with a screw that will allow you to loosen and tighten the hoops. Raised marks on the sides will mark both the vertical and horizontal center of the embroidery area and not necessarily the center of the hoops themselves. Putting a light finger crease in the fabric will allow you to line up the center of the fabric with the center of the embroidery hoop.
The fabric and stabilizer are placed between the inner and outer rings to create neutral tension. The fabric should not be stretched too tight and it should not be loose. If it is difficult to push the outer ring over the inner ring and the fabric, loosen the hoop. Once loaded, the hoop will go under the foot and snap into the hoop connector on the side of the machine. Make sure it snaps securely into place. Do not use your embroidery fabric the first time you hoop. You don’t want to find out too late that the hoop isn’t set right.
Once you have the hoops in place, turn the machine on. Depending on the machine, it may require calibration before it begins to embroider the pattern. If so, the digital display will guide you through the process.
You will have the option to edit your design at this point, such as making it smaller, larger, or off-center. Again, the options you have for altering your design will depend on your specific brand and model of machine.
Press the start button and the machine will continue with the embroidery design until it is complete or until you are prompted to change the color of thread. If the end result is not what you expected, go back through these steps and try to troubleshoot what might be wrong. A little trial and error with the machine needle and thread and material selection will probably have you embroidering like a professional in no time!
